Not everyone likes the fresh look of Windows 11. If you miss the familiar interface of Windows 10, you can bring back the classic Start menu, taskbar, and other familiar elements with a few simple tweaks.
I find Windows 11’s new truncated context menu frustrating. While it’s more streamlined, I constantly have to expand it to access options that aren’t visible in the default view. These extra clicks add up, making the experience less efficient. So, one of the first changes I made to make Windows 11 feel more like Windows 10 was restoring the classic context menu.
To bring it back, first, create a backup of the Registry. Then, follow these steps:
- Press Win + R, type “regedit,” and hit Enter.
- Navigate to HKEY_CURRENT_USER > Software > Classes > CLSID in the left sidebar.
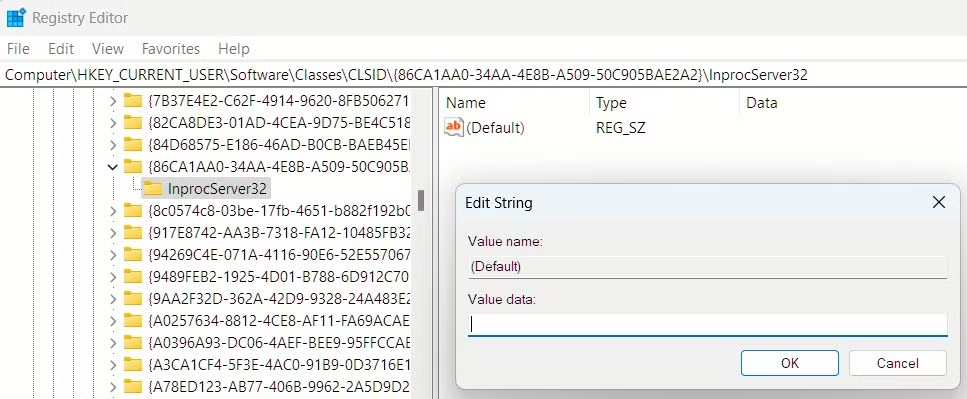
- Right-click CLSID, select New > Key, and name it “{86CA1AA0-34AA-4E8B-A509-50C905BAE2A2}”
- Inside this new key, create another key and name it “InprocServer32.”
- Double-click the Default entry and leave the value blank.
- Click OK, close the Registry Editor, and restart your PC.
I’m using Windows 11 21H2, so some Registry Editor tweaks may not work if you’re on a later build.
2
Revert to the Windows 10 Wallpaper
If you never replaced the iconic blue, glowing Windows 10 wallpaper like me, you might be taken aback by Windows 11’s new default background. While visually appealing, it strips away the familiar Windows aesthetic. Fortunately, you can quickly restore the classic Windows 10 wallpaper.
To bring back the Windows 10 wallpaper on Windows 11, follow these steps:
- Download a high-resolution version of the Windows 10 wallpaper from any reliable online source.
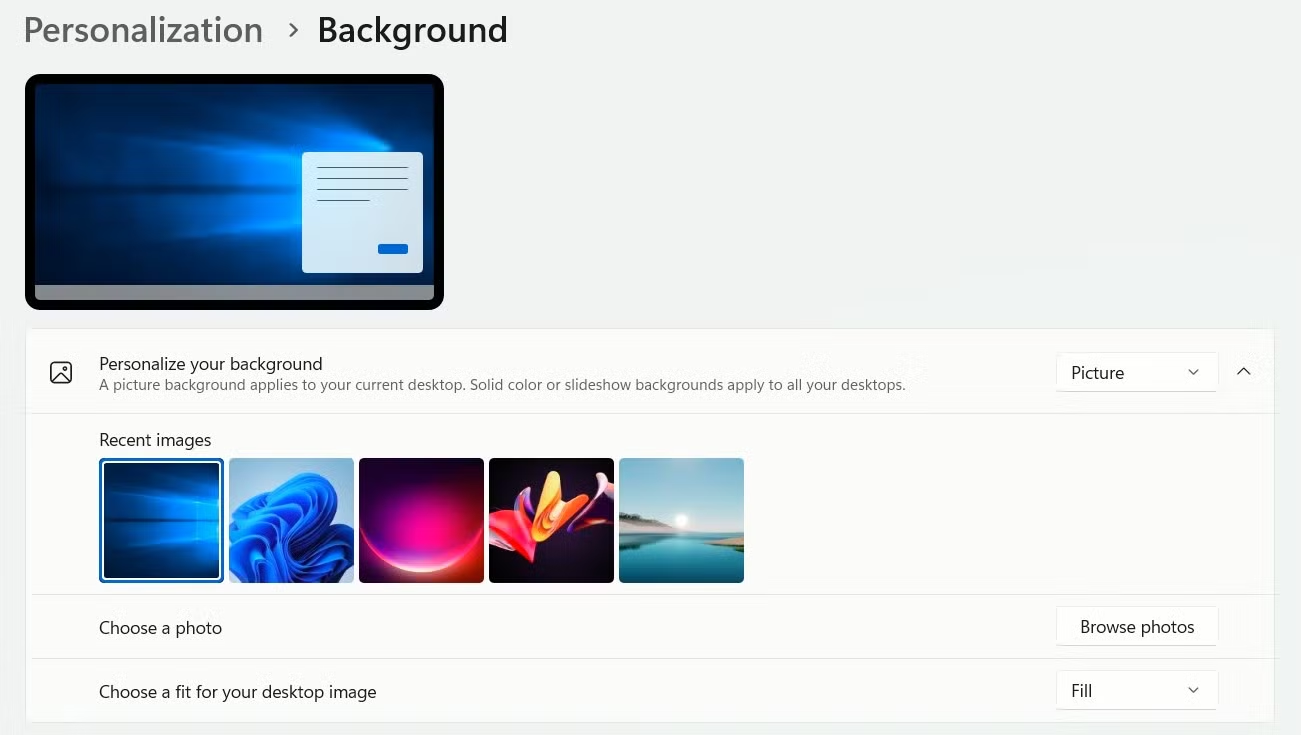
- Right-click on your desktop and select Personalize.
- Click Background, then Browse photos to locate and select the downloaded Windows 10 wallpaper.
Additionally, you can customize your Lock Screen screensaver by navigating to Settings > Personalization > Lock Screen.

3
Restore the File Explorer Ribbon
Like the context menu, Microsoft redesigned File Explorer in Windows 11. While the new streamlined toolbar offers a cleaner look, it also removed the classic, more detailed ribbon I was used to, with all its options readily available. If you prefer the older layout—without having to expand menus—you can bring it back.
To bring back the classic ribbon in File Explorer, follow these steps:
- Press Win + R, type “regedit,” and hit Enter.
- Navigate to HKEY_LOCAL_MACHINE > SOFTWARE > Microsoft > Windows > CurrentVersion > Shell Extensions.
- Select the Blocked key. If it doesn’t exist, right-click Shell Extensions, choose New > Key, and name it “Blocked.”
- In the right pane, right-click, select New > String Value, and name it “{e2bf9676-5f8f-435c-97eb-11607a5bedf7}.”
- Close the Registry Editor and restart your computer.

4
Adjust Taskbar Alignment and Remove Unnecessary Elements
Another visual change in Windows 11 is the centered taskbar, whereas in Windows 10, it was left-aligned. To move it back, right-click the taskbar, select Taskbar Settings, go to Taskbar Behaviors, and choose Left from the dropdown.

You can also turn off unnecessary taskbar elements like Widgets by toggling them off in the settings.

5
Use the Classic Task Manager Instead
Microsoft also refreshed Task Manager by moving the navigation menus to the left instead of the top. While the new design is cleaner and more modern, Windows 10’s layout is more compact, and navigating menus is more straightforward. If you prefer the classic Task Manager, there’s a simple way to open it in the older interface.
To open the Task Manager in the older interface every time, follow these steps:
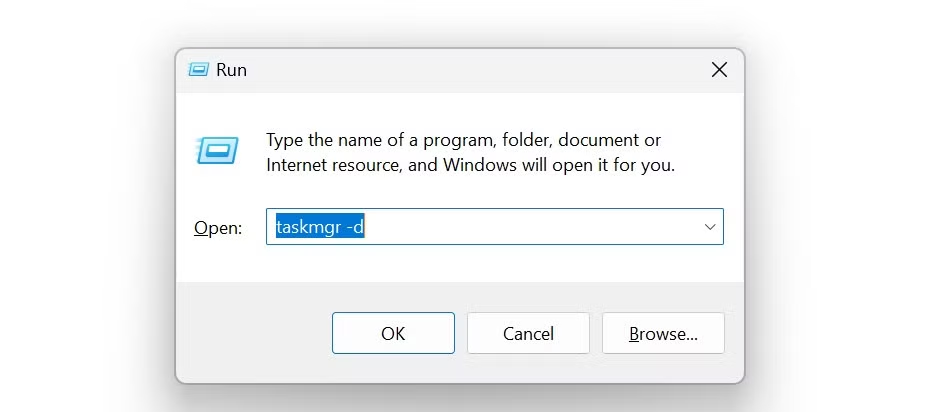
- Press Win + R to open the Run dialog.
- Type “taskmgr -d” and hit OK.
To avoid typing this command repeatedly, you can create a desktop shortcut:
- Right-click on the desktop and select New > Shortcut.
- Type “taskmgr -d” in the location field and click Next.
- Name the shortcut “Classic Task Manager” and click Finish.

Windows simplified the Start Menu layout, and unlike other tweaks on this list, there’s no quick Registry hack to restore the classic Windows 10-style menu. While some workarounds existed in earlier versions of Windows 11, they no longer work. This is one change where you’ll likely need a third-party tool.
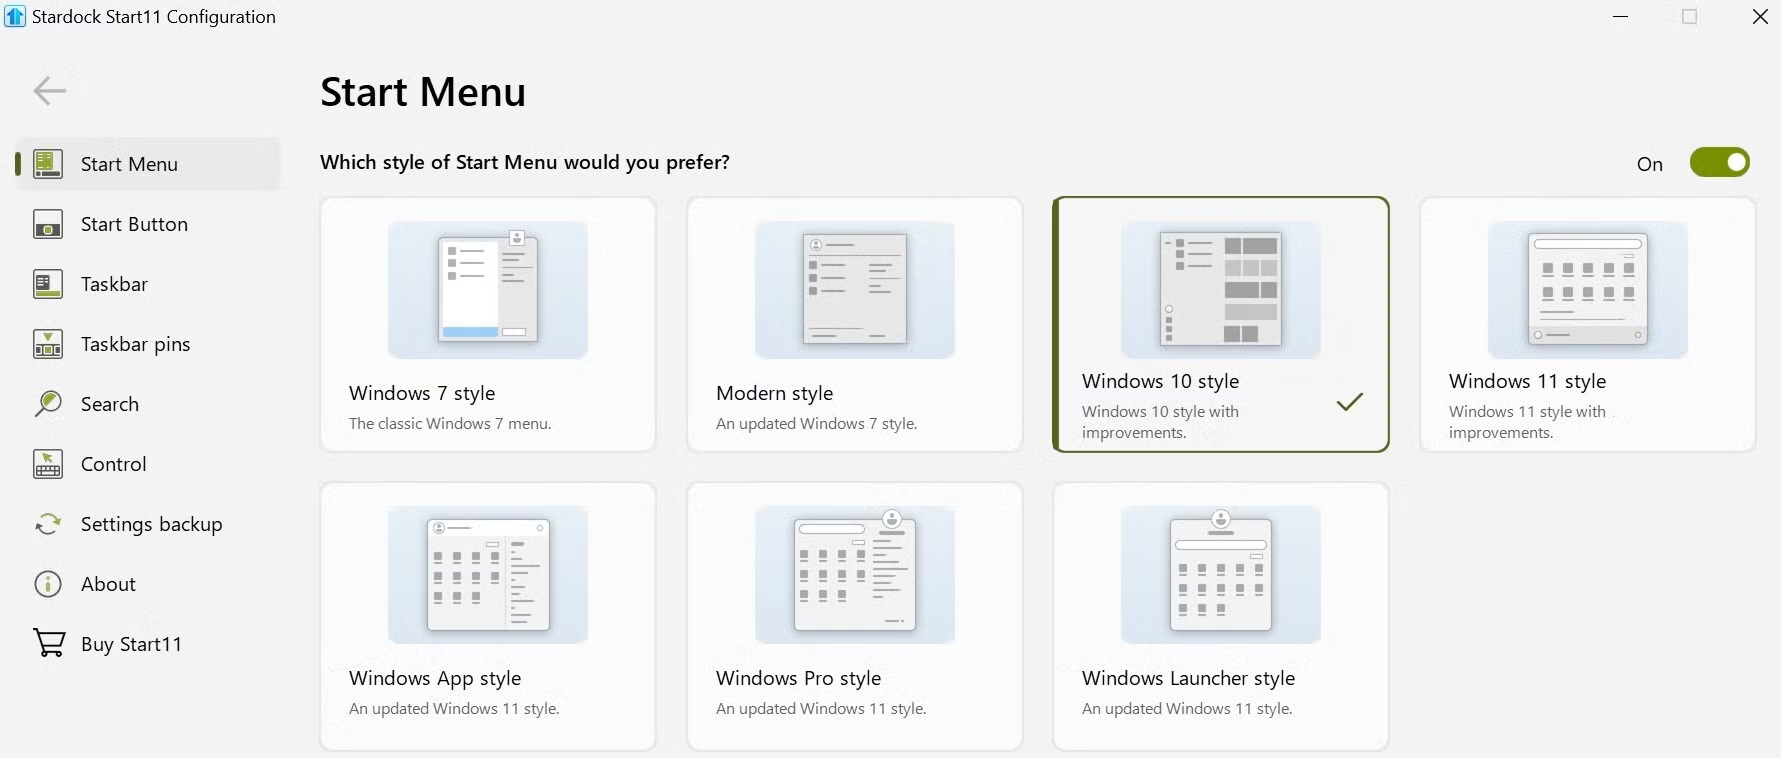
OpenShell (available to download from GitHub) is a solid free option. However, I recommend Start11 for its ease of use. It costs $9.99 per installation, but you can try it for free.
To set it up, follow these steps:
- Purchase and download the tool from Stardock’s website.
- Run the setup file and install it.
- Then, go to the Start Menu tab, select Left Aligned, choose Windows 10 Style, and close the app.
You can also customize it further in the settings.
7
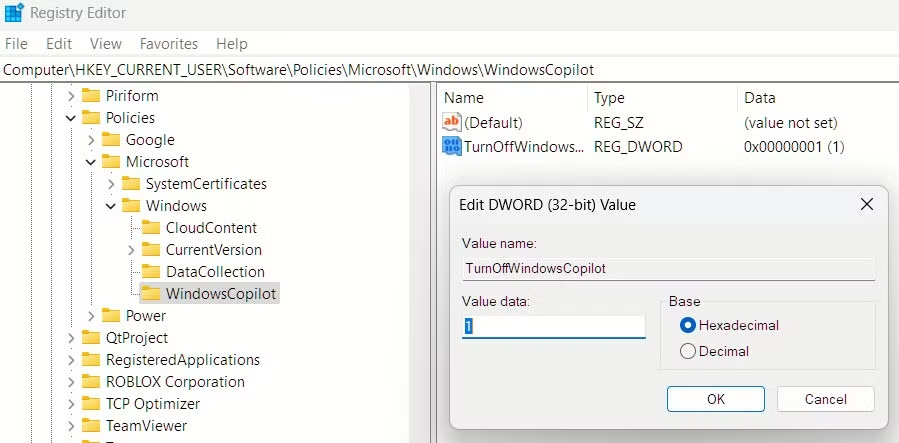
Disable Microsoft Copilot
Windows 11 comes with Microsoft Copilot, an AI assistant designed to help with searches, content creation, and task automation. However, I find it unnecessary clutter. It wasn’t part of Windows 10 when I used it, though it’s also now available there. If you want an actual Windows 10-like experience on Windows 11, you must turn it off.
To turn off Microsoft Copilot, follow these steps:
- Press Win + R, type “regedit,” and hit Enter.
- Navigate to HKEY_CURRENT_USER > Software > Policies > Microsoft > Windows.
- Right-click the Windows folder, select New > Key, and name it “WindowsCopilot.”
- In the right pane, right-click, choose New > DWORD (32-bit) Value, and name it “TurnOffWindowsCopilot.”
- Double-click it, set Value Data to 1, and click OK.
- Restart your computer to apply the changes.
8
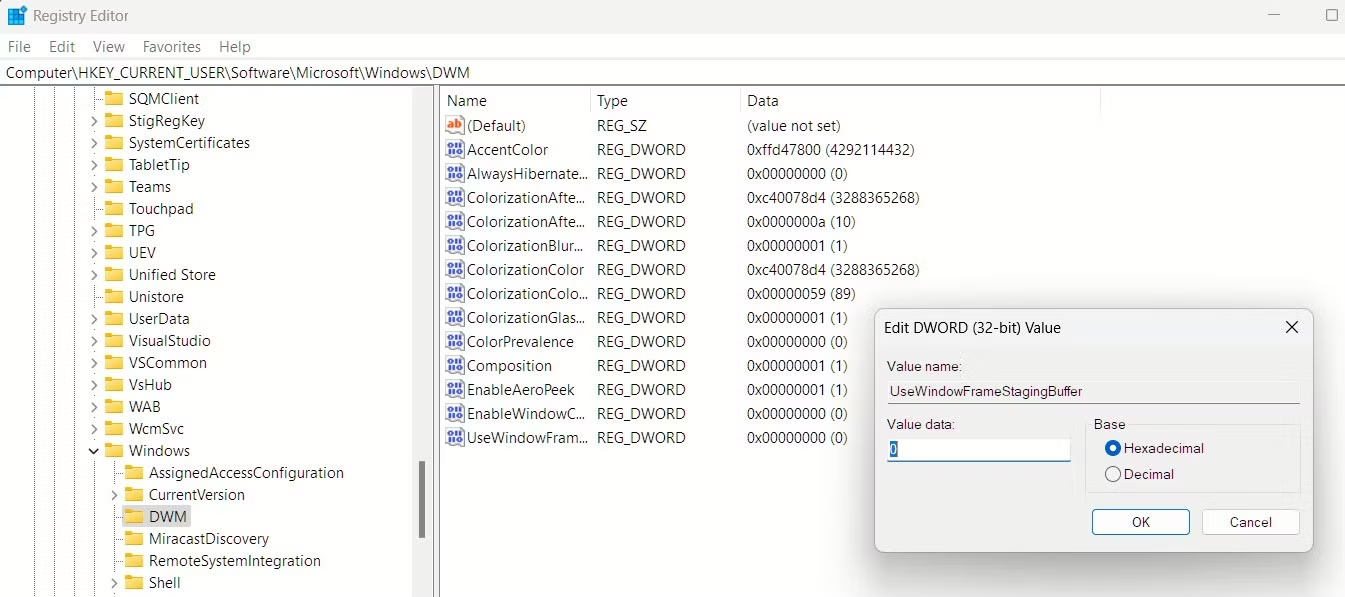
Remove Rounded Corners for a Sharper Look
Windows 11 introduces rounded corners for app windows and UI elements, a subtle design change that gives the interface a modern look. The corner radius varies across different elements, but if you prefer the classic sharp-edged design, you can disable rounded corners to get a Windows 10-like appearance.
To bring back sharper corners, follow these steps:
- Press Win + R, type “regedit,” and hit Enter.
- Navigate to HKEY_CURRENT_USER > Software > Microsoft > Windows > DWM.
- Right-click the DWM key, select New > DWORD (32-bit) Value, and name it “UseWindowFrameStagingBuffer.”
- Double-click this newly created DWORD, set Value Data to 0, and click OK.
- Restart your PC to apply the changes.
That’s how I tweaked Windows 11 to resemble Windows 10. If you’re not a fan of the new design, you don’t have to settle—apply these changes to make your experience comfortable. If you’d rather not tweak the Registry manually, you can use a third-party tool which will make these changes much simpler. However, sometimes support for those tools isn’t the best, which is why I prefer to rely on registry changes.